Toy Organization is quite a feat to tackle, so welcome to part 2 of 3. I’m hoping you’ve had a chance to read part 1 of this series: Finding the Right Layout. Today, I’ll be talking about where all the toys go.
Part 2: Every Toy Has a Home
Once I was able to design our home’s layout to match how the toys would be used, it really decreased the clutter and mess a ton. I’d say it solved 50% of my toy overload problem. And with any organizational process, once you fix the main problem, you then identify the secondary problems. And this is a good thing! Solve problem 1, then move onto problem 2. And soon you realize your remaining problems are just normal life and there’s nothing left to address!
Now that all of our toys were in the toy room and outside, at the end of the day there were no longer 100 toys spread throughout the house, there were now 100 toys spread around a single room. You couldn’t even see the floor! The only way this was going to work was if we had a specific place for each type of toy to live, every toy needed a home!
The Storage You Choose Makes a Big Difference:
I spoke about it briefly last time, but the type of storage you use makes a HUGE difference in toy organization success. After I had changed the layout, I started noticing that a few things didn’t really work out. The board games and puzzles found their way back into the kitchen or toy room because no one wanted to play in the bedrooms anymore. The costumes were constantly ALL over the floor because the various parts and pieces ended up in different bins and the only way for a boy to find them is to dump all five bins out. And our art supplies situation was a disaster! I had attempted to keep them out of reach in the laundry room in bins, but I was constantly interrupted to go get them and the boys had to again dump out the bins in the kitchen to find what they were looking for to make whatever craft they had in mind.
Find What Works:
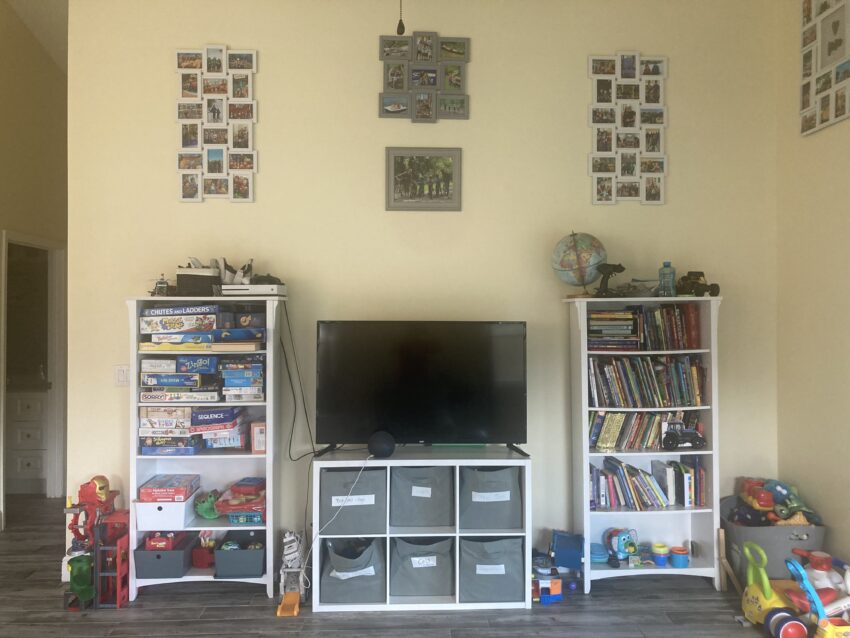
There were some storage options that just plain worked from the beginning. I had a 6-bin organizer and labeled each one for a certain type of toys: Legos, Magnatiles, Figurines, Cars and tracks, Big Cars/Trucks, and Misc which was just a catch all for all the toys that we didn’t quite know what to do with. I had also placed a bin on the lowest bookshelf for all the balls we manage to collect. From bouncy balls, to nerf balls, to mini baseballs and footballs, we have them all and needed a place to put them where they wouldn’t be rolling all around the floor.
The board game issue was easy, we had plenty of space to get a second tall bookshelf and I moved all of the board games and puzzles into the toy room with the rest of the games. I put the hard games like Chess and Sorry! on the top shelves since the boys would need adult help to play them and placed the kid friendly games like Chutes and Ladders and Zingo (this game is amazing, we’ve got 3 versions and it’s been a great addition to family game night!!). The kids now had all of their toys into one room and could easily play games without pulling them out of the bedroom closet.
Fix What Doesn’t:
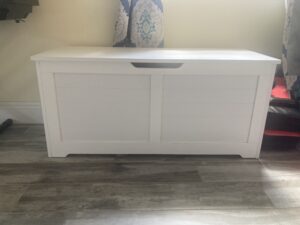
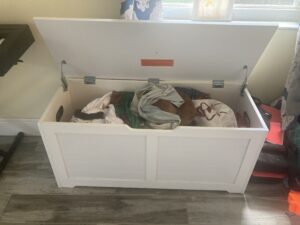
The costume storage was a bigger issue. I didn’t want to downsize because the boys played them a lot. We even went grocery shopping as Power Ranges for a while! So, having 5 bins seemed necessary, but it just didn’t enable the boys to get what they wanted without making a complete and utter mess. I started researching toy chests and found this great Amazon Link – storage chest option! It has the same space as the small bins, but the boys could open the lid, rummage through them without taking them all out, and find exactly what they needed all on their own. Plus it has a cute little bench top so when the boys were playing games or reading books they had another place to site outside of the kitchen. It worked so well that I actually ended up getting a second one as our costume collection continues to grow!


Lastly, I had to deal with the art storage situation. No matter what I chose, the only requirement was that all art projects be done at the kitchen table. So, I decided to create an art corner in the toy room and got two stand up art drawer organizers from Ikea. In one, I used drawer organizers to keep the crayons separate from the markers, separate form the dry erase markers, separate from the pens and pencils. And the great thing about them was that they are individual bins so the boys could go to the drawer, grab the entire bin of crayons, and easily bring it to the table. I put glue sticks and scissors in their own drawer and told the boys that the second they open this drawer, they must have adult supervision to use them (it’s surprisingly worked so far). Then I organized all of the paper, coloring books, popsicle sticks and pipe cleaners etc in their own drawers as well. One of the best ideas was that I also used a drawer to house all of the Play-Doh and kinetic sand with their associated toys so the boys would also remember that these are only for use at the kitchen table too. Taking the guess work out for them made it easier for them to make the right decisions and easier for me to course correct if they happened to forget.
Conclusion:
Having the right storage solutions for each type of toy has gone a long way in making sure each toy is easy to find, easy to play with and easy to put away. Gone are the days of the constant, “Mom, can you help me get…” and “Mom, I can’t find…”. This makes for happy boys and a less stressed mom!
And in part 3 next week, I’ll talk about teaching the kids toy responsibility so Mom can start being a part of the fun, not a maid, at toy time!


1 thought on “Toy Organization: Hacks for Playroom Perfection! (2)”